 |
| Figure 1 - Learning how to operate the Topcon Total Station. |
The Total Station works by shooting a laser at a prism that is on top of a pole. The prism reflects the laser back and the Total Station can determine the location and topographical elevation by the angle of the laser and the time it took to travel. Typically, one person will hold the pole with the prism on it and one or two people will operate the Total Station. The person with the prism will stand in as many places as necessary to collect enough points.
Equipment
Topcon Total Station (Figure 2)
 |
| Figure 2 - Topcon Total Station |
Topcon GMS-2
 |
| Figure 3 - Topcon GMS - 2 |
TruePulse 360 Laser Rangefinder
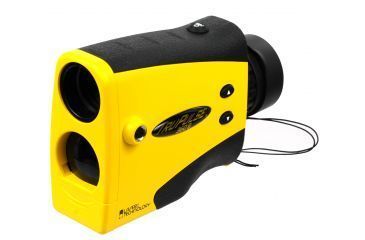 |
| Figure 4 - TruePulse 360 Laser Rangefinder |
Survey Area
 |
| Figure 5 - Location of UW- Eau Claire and study area. |
Originally, we wanted to do the same area of campus that we did for the distance azimuth survey. This area was too small and too crowded to do an effective survey, however. The campus mall is a wide open area that is more conducive to learning how to do our first survey.
The assignment called for surveying an area a hectare in size (100m x 100m). The area, however, did not get 100m in the north-south direction, so we extended the area east-west that we surveyed to get roughly the same area of coverage.
 |
| Figure 6 - Study area on campus. There are not yet any current aerial images of campus. The area within the red box is an open, grassy area with rock benches. |
The following images (Figures 7- 10) are pictures of our study area.
 |
| Figure 7 - Facing north/northeast towards Schofield Hall |
 |
| Figure 8 - Facing west/northwest towards McIntyre Library |
 |
| Figure 9 - Facing southeast towards Roosevelt Ave. |
 |
| Figure 10 - Facing southwest towards the Davies Center. |
Methods
 |
| Figure 11 - Example of Total Station tripod setup. |
To begin the survey, our group needed to set up and level the tripod as well as the Total Station itself. This would ensure that our measurements were accurate. The tripod legs need to be spaced equally apart and have a wide base to ensure stability (Figure 11).
 |
| Figure 12 - Leveling screw and circular level. |
Next, the Total station can be placed on the tripod and screwed onto the top. Once the device is attached, it's time to level. There are two different areas to level: the circular level and the plate level. The circular level is calibrated by adjusting the length of the legs of the tripod until the bubble is in the center of the circle (Figure 12).
 |
| Figure 13 - Plate level. |
Next is the plate level (Figure 13). There are three screws near the base of the device that can fine-tune the plate level (Figure 12). To get the bubble in the center of the plate level, face the device between two of the screws, turn one until the bubble is in the middle, then rotate the device to be in-between the next screws. Keep doing this until the bubble stays in the center of the plate level.
 |
| Figure 14 - Leveled Total Station ready to collect data. |
Once this step is done, both levels should be calibrated. Figure 14 shows a leveled, ready-to-go Total Station. The height of both the Total Station and the pole holding the prism are also measured and will be entered later.
First we used the GMS to gather a point directly below the Total Station. This would be used as our occupied point. The occupied point is the point that all the other data is collected from. If we have the location of this point, then everything we gather should be accurate (similar to the distance azimuth assignment we did earlier). We then had to set our backsight. We did this by using the TruPulse to find the azimuth to our backsight and label it as such in the GMS. We were then ready to start collecting data.
 |
| Figure 15 - Jeremy using the GMS to collect the points while I sight the Total Station. Zach is circled in red holding the prism at the collection point. |
 |
| Figure 16 - The survey points that we collected, as well as arrows showing the direction and method of point collection. |
Results
Our results seemed to be pretty accurate. It is difficult to tell in the figure 17 map (the aerial images are not up to date, so the Davies Center as well as Little Niagara Creek are not shown in the correct locations), but the area of lower elevation is where the campus mall slopes down to the creek. The rest of the survey area, while varying slightly, was mostly level.
 |
| Figure 17 - Results of survey interpolated using the Nearest Neighbor method. Range of elevation is from 236.263 - 239.263 meters above sea level. |
Discussion
The difficult part of this exercise was setting up the total station. Our professor came out with us when we went to do the survey to show us how to navigate the menus and set up the device. The actual data collection was simple and just a matter of doing the same thing 147 times. The largest issue we encountered (and from talking with others, we weren't the only group that did) was that the Bluetooth connection from the Total Station to the GMS kept disconnecting. This was pretty frustrating, and we never really found out why this was happening. We just had to go back into the settings, reconnect, and continue.
We had intended to switch off roles so everyone got some experience with each, but we realized that the survey went quicker if we each did the same thing for the duration. We were able to get into a good rhythm that way, instead of trading off and having to get into a new rhythm each time. Also, when we leveled the Total Station, we did not take into account that the three of us are different heights. I started off as the one sighting through the device, and I am the shortest one in the group. Zach is much taller than I, and it would have been uncomfortable for him to have to bend over the whole time. We could have adjusted the station, but that also would have taken more time. While it was mostly sunny that day, there was a chilly wind. We decided to not break our momentum and finish the project as quickly as possible.
Luckily, we had no issues when exporting the data to the computer. It went smoothly, as did interpolation and map creation.
Conclusion
The results, while accurate, are a little boring to look at. There is only about a 3 meter range between the highest and lowest point, meaning the survey area was pretty level. This worked out well since we all were using this technology for the first time. Learning would have been slightly more difficult had we had a very diverse terrain. But a slightly greater elevation range would have at least made the resulting map more satisfying.
Terrain surveying is something that is always needed in various different work sectors. I like having a general understanding of the processes, but I hope to gain more knowledge in the future. When surveying larger plots and more dynamic terrain, the Total Station would have to be moved, adding extra steps to the process. This activity was only a brief introduction to land surveying.
No comments:
Post a Comment